


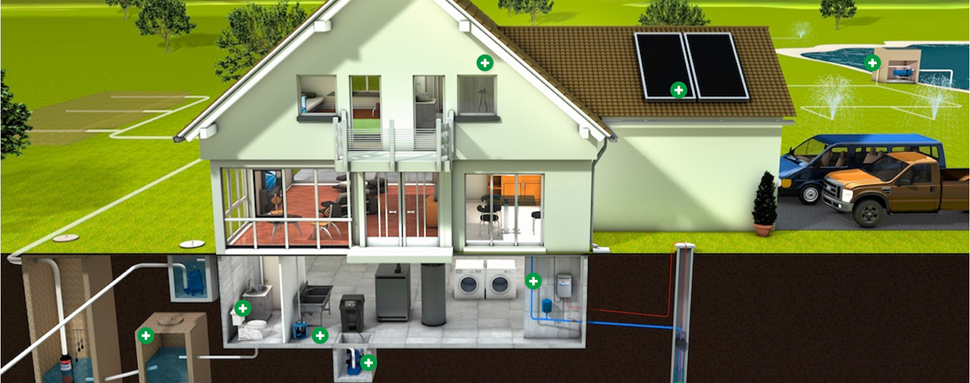

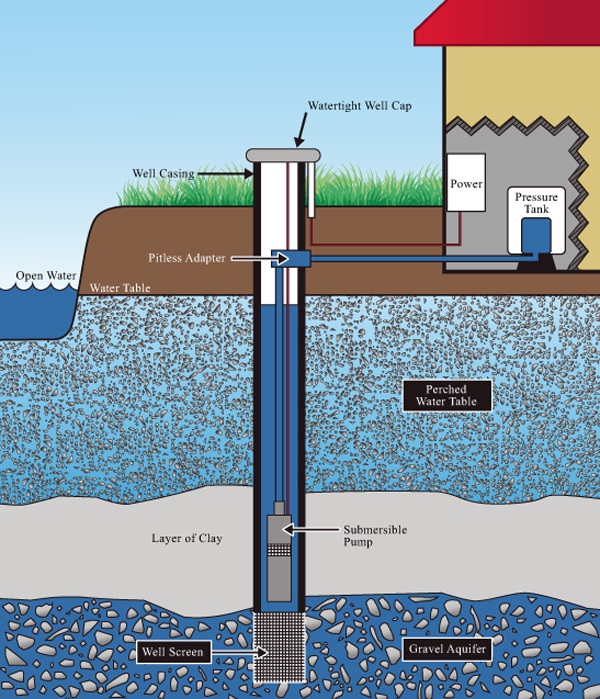
 Water Wells
 Pumps & Pressure Tanks
 Water Treatment
 Pumps & Pressure Tanks
| How Your Pressure Tank Protects Your Well Pump | |
 |
|
| Attention Well Owners! | |
| 22 Simple and Easy Steps to Prevent Expensive and Unnecessary Wear & Tear on Your Water Pump & Pressure Tank System |
|
|
Well contractor reports show that 80% of no-water calls involve improper volume of air in the pressure tank.
|
|
|
The main purpose of the pressure tank is to increase the life of your submersible pump, pump wires, capacitor,
pressure switch and a small benefit of keeping your electrical bill lower. The pressure tank does this by preventing the pump
from turning ON & OFF too often also known as short-cycling. Pump manufacturers recommend a minimum run time of 1 minute.
|
|
| Step 1 | Make sure your water pressure gauge located close to your pressure tank is accurate. Locate the valve stem on the pressure tank; it looks similar as a tire valve stem. Using a tire pressure gauge measure the air pressure in the pressure tank, it should read the same as the water pressure gauge. The water pressure gauge could have iron/sediment built up inside of it causing an inaccurate reading. Replace if necessary. |

|
|
| Step 2 | Determine what style of pressure tank you have. It will be either a galvanized, steel tank or a diaphragm tank. The galvanized tank is a simple empty tank where the air comes in direct contact with the water -see Step 3. A diaphragm tank is a more common type of tank normally painted steel and sometimes gray fiberglass - see Step 11. |
|
|
|
| Step 3 | Put the softener or any water treatment device in the bypass position. This will prevent dirty water from damaging it. |
|
|
|
| Step 4 | Turn off the power to the pump. |
|
|
|
| Step 5 | Turn on the laundry faucet or a high flow faucet with-out a screen. |
|
|
|
| Step 6 | With an air compressor fill the galvanized tank, through the valve stem, until the air blows out of the laundry faucet. |
|
|
|
| Step 7 | Stop filling tank with compressed air, wait until all of the extra air releases from the laundry faucet, then close the laundry faucet. |
|
|
|
| Step 8 | Turn the power to the pump back on. |
|
|
|
| Step 9 | Wait till the pressure switch turns the pump off, then open the laundry faucet. Be careful - you will get shots of air. Flush the air and dirty water from the faucet. Once the water is clean, then close the faucet. |
|
|
|
| Step 10 | Put the softener or any water treatment device from the bypass position back to the service position. Your galvanized pressure tank is now recharged with air. Typically, this should be done every 3 months. |
| If you are wondering where the air disappears to and why it has to be recharged every 3 months, it is because the oxygen in the air oxidizes the impurities of the water. So over time the air volume decreases, the ON & OFF cycle time decreases and the pump life decreases. One way to prevent the decrease of air is by separating them with a diaphragm. | |
|
|
|
|
Step 11 (diaphragm tank from Step 1) |
Find out what the pressure switch's cut-in and cut-out psi is. To do this simply turn on a faucet inside the house and make a note at what psi the pressure switch turns on. Turn off the faucet and make a note what psi the pressure switch turns off. Most pressure switches are pre-set for a cut-in of 40psi and a cut-out of 60psi. This information will be needed in Step 15 |
|
|
|
| Step 12 | Put the softener or any water treatment device in the bypass position. This will prevent dirty water from damaging it. |
|
|
|
| Step 13 | Turn off the power to the pump. |
|
|
|
| Step 14 | Turn on the laundry faucet or a high flow faucet with-out a screen. |
|
|
|
| Step 15 | After the water stops flowing from the laundry faucet, the water tank should be 100% full of air and very lightweight. You can do a quick test by grabbing the top of the tank and lean it side to side. If the tank feels heavy or if you hear water swooshing back and forth inside the tank, then the tank is low on air or the internal diaphragm could be ruptured. |
|
|
|
| Step 16 | Measure the pre-charge air pressure inside the diaphragm pressure tank using a tire pressure gauge on the valve stem. It should be 2psi less than the cut-in psi. Example: if the cut-in psi is 40psi, then the pre-charge psi should be 38psi. If the pre-charge pressure is correct, then you can jump to Step 18. |
|
|
|
| Step 17 | If the pre-charge pressure is low, then with an air compressor fill the diaphragm tank with air until the pre-charge pressure reads 2psi below the cut-in pressure. If the tank will not hold air pressure, then the diaphragm is ruptured and the tank needs to be replaced. |
|
|
|
| Step 18 | Once the tank pre-charge pressure is set, double check that the pressure tank is 100% air and very lightweight. This can be done by grabbing the top of the pressure tank and lean it side to side. At this point if the tank feels heavy or if you hear water swooshing back and forth inside the tank, then the diaphragm is ruptured and the tank needs to be replaced. |
|
|
|
| Step 19 | If the tank feels very lightweight than close the laundry faucet. |
|
|
|
| Step 20 | Turn the power to the pump back on. |
|
|
|
| Step 21 | Wait till the pressure switch turns the pump off, then open the laundry faucet. Flush the dirty water from the faucet. When the water is clean, then close the faucet. |
|
|
|
| Step 22 | Put the softener or any water treatment device from the bypass position back to the service position. Double check to make sure pressure tank is sized correctly, it should run for a minimum of 1 minute between pump cycle ON & OFF. |
|
Congratulations! You have just saved your water system from unnecessary wear and tear. Now if your water pump burns out you know it's because of old age, not a pre-mature burn-out. |
|
